

Java Database Connectivity (JDBC) is an application programming interface (API) for the Java programming language which defines how a client may access a database. It is a Java-based data access technology used for Java database connectivity.
JDBC (Java Database Connectivity) is the Java API that manages connecting to a database, issuing queries and commands, and handling result sets obtained from the database. Released as part of JDK 1.1 in 1997, JDBC was one of the earliest libraries developed for the Java language.
JDBC was initially conceived as a client-side API, enabling a Java client to interact with a data source. That changed with JDBC 2.0, which included an optional package supporting server-side JDBC connections. Every new JDBC release since then has featured updates to both the client-side package (java.sql) and the server-side package (javax.sql). JDBC 4.3, the most current version as of this writing, was released as part of Java SE 9 in September 2017 as JSR 221.
This article presents an overview of JDBC and JDBC drivers, followed by a hands-on introduction to using JDBC to connect a Java client to a lightweight relational database.
How JDBC works?
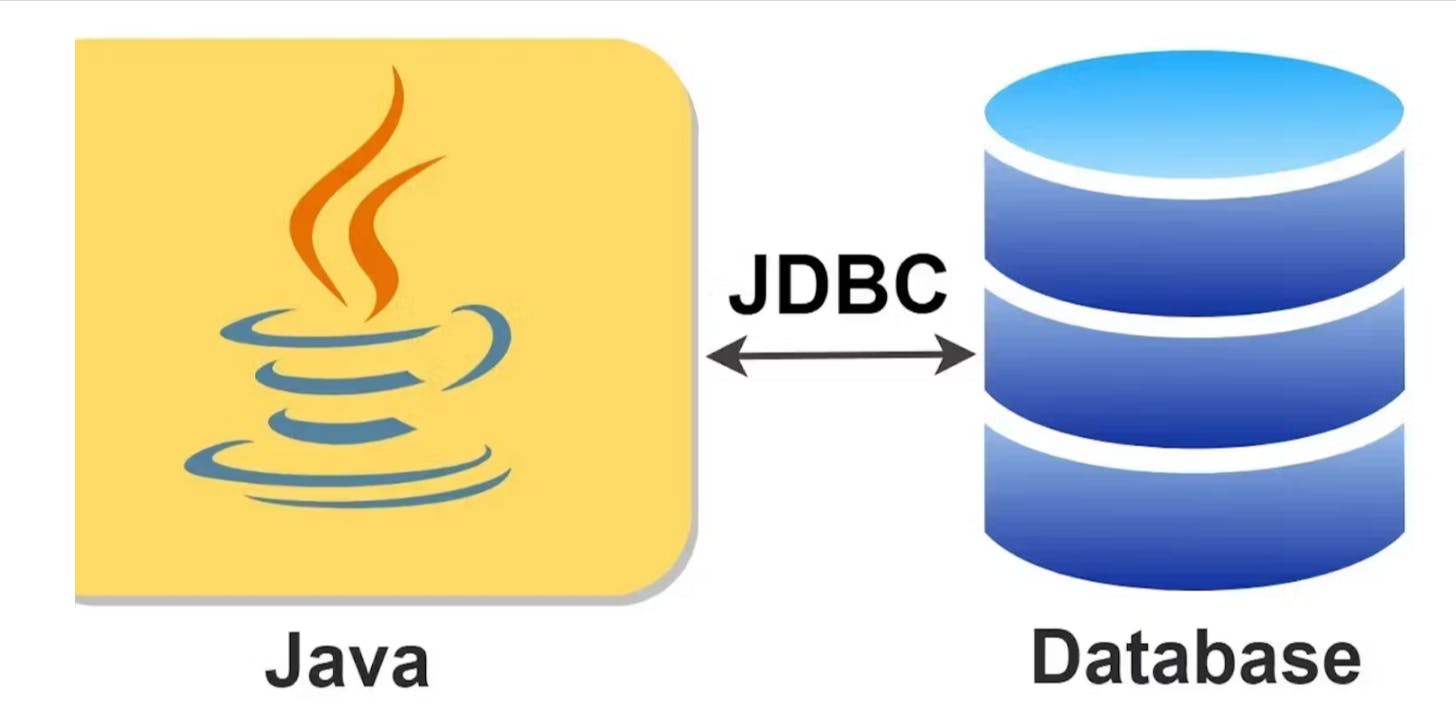
As a developer, you can use JDBC to interact with a database from within a Java program. JDBC acts as a bridge from your code to the database, as shown in Figure 1.
Figure 1. JDBC connects Java programs to databases.
JDBC vs ODBC
Before JDBC, developers used Open Database Connectivity (ODBC), a language-agnostic standard approach to accessing a relational database management system, or RDBMS. In some ways, JDBC takes its inspiration from ODBC. The difference is that JDBC is Java-specific, offering a programming-level interface that handles the mechanics of Java applications communicating with a database.
JDBC’s architecture
The JDBC interface consists of two layers:
The JDBC API supports communication between the Java application and the JDBC manager.
The JDBC driver supports communication between the JDBC manager and the database driver.
The JDBC API and JDBC driver have been refined extensively over the years, resulting in a feature-rich, performant, and reliable library.
JDBC is the common API that your application code interacts with. Beneath that is the JDBC-compliant driver for the database you are using.
Figure 2 illustrates the JDBC architecture.
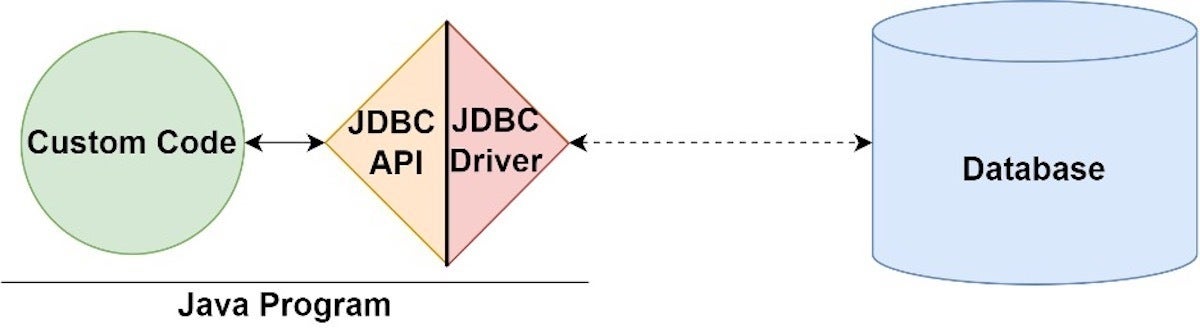
Figure 2. JDBC’s architecture consists of the JDBC API and JDBC drivers.
JDBC drivers
As an application programmer, you don’t need to immediately be concerned with the implementation of the driver you use, so long as it is secure and official. However, it is useful to be aware that there are four JDBC driver types:
JDBC-ODBC bridge driver: A thin Java layer that uses an ODBC driver under the hood.
Native API driver: Provides an interface from Java to the native database client.
Middleware driver: A universal interface (“middleware”) between Java and the RDBMS’s vendor-specific protocol.
Pure Java driver: A driver that implements the vendor-specific protocol directly in Java.
When you start thinking about architecture and performance, it will be beneficial to consider the type of driver you are using.
Simple database connections and queries:
One of the benefits of programming in the Java ecosystem is that you will likely find a stable JDBC database connector for whatever database you choose. In this tutorial, we'll use SQLite to get to know JDBC, mainly because it's so easy to use.
The steps for connecting to a database with JDBC are as follows:
Install or locate the database you want to access.
Include the JDBC library.
Ensure the JDBC driver you need is on your classpath.
Use the JDBC library to obtain a connection to the database.
Use the connection to issue SQL commands.
Close the connection when you are finished.
We'll go through these steps together.
Finding a JDBC driver
To find a driver for your chosen database, simply do a web search for your database and JDBC. For instance, typing in "mysql jdbc driver" will turn up a driver for MySQL. I challenge you to find an enterprise-grade database without a JDBC driver!
Step 1. Download and install SQLite
SQLite is a very compact database. It isn't intended for production use but is a great choice for quickly trying things out. SQLite uses a file as its functional database, without requiring any service or daemon installations.
To get started with this demonstration, first download the SQLite sample database. Unzip the .db file and save it somewhere you won't forget. This file contains both a functional file-based database and sample schema and data that we can use.
SQL and JDBC
NoSQL is popular but relational databases remain the most used type of datastore. A relational database is a structured repository consisting of tables with columns and rows and the relationships between the tables. SQL, or structured query language, is the language data architects use to perform CRUD (create, read, update, and delete) operations on records in a relational database. JDBC is an adapter layer from Java to SQL: it gives Java developers a common interface for connecting to a database, issuing queries and commands, and managing responses.
Step 2. Import JDBC into your Java application
We could do our coding in an IDE, but coding directly in a text editor will better demonstrate JDBC's simplicity. To begin, you will need to have a compatible JDK installation for your operating system.
Assuming you have a JDK installed, we can start by creating a simple Java program. In your text editor, paste in the code shown in Listing 1. Call this file WhatIsJdbc.java.
Listing 1. A simple Java program
class WhatIsJdbc{
  public static void main(String args[]){
      System.out.println("Hello InfoWorld");
  }
}
Now, compile the code by entering the command: javac WhatIsJdbc.java. Compiling will output the WhatIsJdbc.class file. Execute this file from the command line with the call: java WhatIsJdbc.
Once you have a basic Java program, you can include the JDBC libraries. Paste in the code from Listing 2 at the head of your simple Java program.
Listing 2. JDBC imports
import java.sql.Connection;
import java.sql.DriverManager;
import java.sql.SQLException;
import java.sql.ResultSet;
import java.sql.Statement;
Each of these imports provides access to a class that facilitates the standard Java database connection:
Connectionrepresents the connection to the database.DriverManagerobtains the connection to the database. (Another option isDataSource, used for connection pooling.)SQLExceptionhandles SQL errors between the Java application and the database.ResultSetandStatementmodel the data result sets and SQL statements.
You'll see each of these in action shortly.
Step 3. Add the JDBC driver to your classpath
Next, you'll add the SQLite driver to your classpath. Remember, a JDBC driver is a class that implements the JDBC API for a specific database.
Go to the GitHub page for SQLite driver and download the latest SQLite .jar. If you are using Maven or Gradle, or something similar, you can add the driver via the Maven repository. Be sure to get the most recent .jar file and store it somewhere you'll remember.
The next time you execute your Java program, you will pull in that .jar file via the classpath. There are several ways to set the classpath. Listing 3 shows how to do it using a command-line switch.
Listing 3. Executing the SQLite driver on the Java classpath
java.exe -classpath /path-to-driver/sqlite-jdbc-3.23.1.jar:. WhatIsJdbc
Notice that we've set the classpath to point at the driver and the local directory; this way, Java will still find our class file.
Step 4. Obtain a database connection
The classpath now has access to the driver. Next, change your simple Java application file to look like the program in Listing 4.
Listing 4. Using the JDBC Connection class to connect to SQLite
import java.sql.Connection;
import java.sql.DriverManager;
import java.sql.SQLException;
import java.sql.ResultSet;
import java.sql.Statement;

 String sql = "SELECT id, username FROM users WHERE id = ?";
    List users = new ArrayList<>();
    try (Connection con = DriverManager.getConnection(myConnectionURL);
         PreparedStatement ps = con.prepareStatement(sql)) {
        ps.setInt(1, userId);
        try (ResultSet rs = ps.executeQuery()) {
            while(rs.next()) {
                users.add(new User(rs.getInt("id"), rs.getString("name")));
            }
        }
    } catch (SQLException e) {
        e.printStackTrace();
    }
    return users;

class WhatIsJdbc{
  public static void main(String[] args) {
    String url = "jdbc:sqlite:path-to-db/chinook/chinook.db";
    try (Connection conn = DriverManager.getConnection(url){

      System.out.println("Got it!");

    } catch (SQLException e) {
      throw new Error("Problem", e);
    }
  }
}
Compile and execute this code. Assuming all goes well, you will get an affirming message.
No suitable driver found
If you've received an error that looks like "No suitable driver found for jdbc:sqlite," then you need to revisit the classpath and make sure it points to the driver you downloaded. Failed driver connection is the most common stumbling block for beginners using JDBC. Don't sweat it; just fix it.
Now, we're ready for some SQL commands.
Step 5. Query the database
With the live connection object in hand, we can do something useful, like querying the database. Listing 5 shows how to query SQLite using the JDBC Connection and Statement objects.
Listing 5. Querying the database with JDBC
import java.sql.Connection;
import java.sql.DriverManager;
import java.sql.SQLException;
import java.sql.ResultSet;
import java.sql.Statement;

class WhatIsJdbc{
  public static void main(String[] args) {
    String sql = "SELECT id, username FROM users WHERE id = ?";
    String url = "jdbc:sqlite:path-to-db-file/chinook/chinook.db";
    try (Connection conn = DriverManager.getConnection(url);
      Statement stmt = conn.createStatement()) {

      try {
        ResultSet rs = stmt.executeQuery("select * from albums";);
        while (rs.next()) {
          String name = rs.getString("title");
          System.out.println(name);
        }
      } catch (SQLException e ) {
            throw new Error("Problem", e);
      }

    } catch (SQLException e) {
      throw new Error("Problem", e);
    }
  }
}
In Listing 5 we use our Connection object to obtain a Statement object: conn.createStatement(). We then use this object to execute an SQL query: stmt.executeQuery(query).
The executeQuery command returns a ResultSet object, which we then use to iterate over the data with while (rs.next()). In this example, you should see the album titles we've queried on as output.
Notice that we also closed the connection, via a call to conn.close().
Network connections with JDBC
The database connection string in Listing 5 is for a local connection: jdbc:sqlite:path-to-db-file/chinook/chinook.db. To access the database via a network, the connection string would need to include the network URL and (usually) credentials for accessing it.
PreparedStatements, batch updates, and transactions
So far, we've covered the basics of using JDBC to connect to a database and issue SQL commands. While Statements and ResultSets work well for common scenarios, you'll likely need additional options for larger or more complex applications. Fortunately, the JDBC library continues evolving to meet most database access needs.
PreparedStatements
One easy way to increase the flexibility of your code is to replace the Statement class with PreparedStatement, as shown in Listing 6.
Listing 6. Using JDBC PreparedStatements
String prepState = "insert into albums values (?, ?);";
PreparedStatement prepState = connection.prepareStatement(sql);

prepState.setString(1, "Uprising");
prepState.setString(2, "Bob Marley and the Wailers  ");

int rowsAffected = preparedStatement.executeUpdate();
PreparedStatement replaces Statement's hard-coded values with question marks (?). Using PreparedStatements optimizes your code for reuse: a PreparedStatement is compiled only once and can be reused with a variety of parameters. As your code base grows, you simply insert new values into the statement, instead of hacking the string object itself.
Batch updates
Whenever an application has several updates to issue, doing them in batches can greatly benefit performance. The essence of batching is to take the multiple updates and collect them together, then issue them all at once. Listing 7 uses JDBC's batch methods to perform a batch update of several PreparedStatements.
Listing 7. Batching with PreparedStatement
prepState.setString(1, "Uprising");
prepState.setString(2, "Bob Marley and the Wailers");
preparedStatement.addBatch();

prepState.setString(1, "Wildflowers");
prepState.setString(2, "Tom Petty and the Heartbreakers");
preparedStatement.addBatch();

int[]  rowsAffected   = preparedStatement.executeBatch();
JDBC transactions
You can use transactions in relational databases to wrap a set of updates in an interaction that either succeeds or fails altogether. The basic process of using a transaction via JDBC is to tell the system to turn off auto-commit, and then manually tell the system to commit when you are done. By default, auto-commit is on, which means whenever an executeUpdate or executeInsert is run, the command is committed. Listing 8 shows a small slice of a JDBC transaction.
Listing 8. JDBC transactions
connection.setAutoCommit(false);
// Use executeUpdate multiple times
connection.commit();
When the system encounters a connection.commit(), it will attempt all the updates wrapped inside. If any one of the updates fails, all of them will be rolled back.
JDBC 4.3 has many more features worth exploring, including connection pooling with DataSource objects, which we'll look at next.
TABLE OF CONTENTS
Connection pooling with JDBC
Connection pooling is a performance improvement that lets you reuse a collection of database connections based on certain parameters. Instead of generating, using, and discarding connections, you maintain them in a pool. This section shows you how to use a JDBC DataSource object for connection pooling.
Because SQLite is a simple file database, we don’t really need to pool its connections. But its driver does offer a pooling DataSource at org.sqlite.javax.SQLiteConnectionPoolDataSource. (Note that not all DataSource object implementations support connection pooling.)
There are several approaches to obtaining a connection pool, including using a separate pooling service obtained from the Java Naming and Directory Interface (JNDI). Often, you will use a pool that ships with your application server, such as the Tomcat JDBC connection pool. Another option is to use a third-party tool, like the C3PO project. We’ll use C3PO for our example.
C3PO for connection pooling
Using C3PO with SQLite is relatively simple. You can do it by wrapping a previously configured SQLite data source (if you need the configuration) or configuring the pool with your database specifications directly in C3PO. We’ll try the simpler option. Note that you will need to have the C3PO .jar on your classpath.
Listing 9. JDBC connection pooling with C3PO
import com.mchange.v2.c3p0.ComboPooledDataSource;
import org.sqlite.javax.SQLiteConnectionPoolDataSource;
import org.sqlite.SQLiteConfig;
import java.sql.Connection;
Listing 9 shows that there are a variety of options for tuning how the pool works, such as how many connections to hold and what increments to acquire them in. This listing just gives you a sense of what’s possible. Notice that with the pooling store configured, the actual code use of the JDBC database is exactly as before. The only difference is in how you build the Connection object.
JDBC and JNDI
A common refinement to an application’s architecture is to move obtaining the database and connection pool to JNDI, where the configuration parameters are externalized and available for modification without touching the source code.
Conclusion
JDBC is one of Java's oldest APIs, providing an easy-to-use solution for one of the perennial needs of Java application development. Knowing just the few JDBC calls demonstrated in this article will get you started using JDBC to connect to virtually any database. Once you've got those commands down, you can begin to explore some of the more sophisticated options that are built into JDBC.
While JDBC is sufficient for simpler applications, most developers will eventually look to the Jakarta Persistence API (formerly the Java Persistence API) to develop a more formal data access layer. JPA requires more up-front work and a more sophisticated understanding of the application architecture, but it nets you a more consistent, isolated, and well-defined data access layer. See the companion to this article, What is JPA? Introduction to the Jakarta Persistence API for more about developing the data persistence layer for your Java applications.